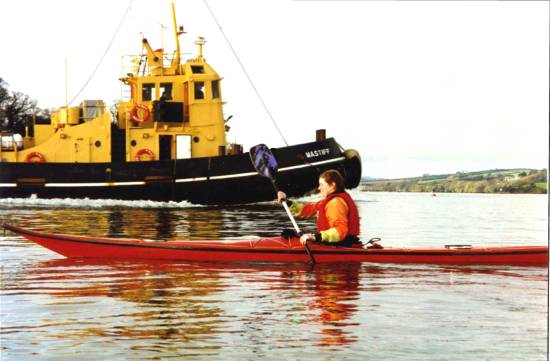
Probably the two most important techniques for a sea kayaker are:
- Plain ordinary forwards paddling, which we look at below.
- The brace stroke you use to stay upright when a small breaking wave hits you from the side.
Paddling forwards & backwards
![]()
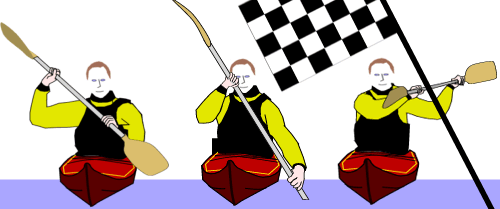
Basic paddling position How to paddle forwards Body rotation More improvements Staying on course Coping with wind from the side Getting technical Getting really, really technical Paddling backwards
 |
Probably the two most important techniques for a sea kayaker are:
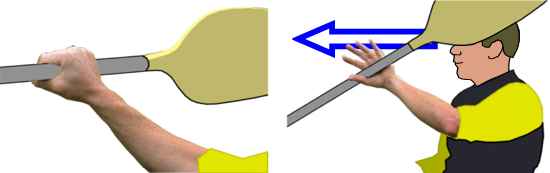
We're going to assume that you have the usual Euro-style paddle with large, slightly spoon-shaped blades. The concave side of the blade is the "power face" and the other side is the back. The blades are usually set an angle to each other, which is known as feathering or off-set. The paddles illustrated in Kayarchy are right-handed.
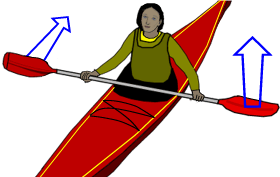 Place your hands on the paddle shaft, a comfortable distance apart. Put the right blade vertical with the power face pointing backwards. The other blade is now approximately horizontal, with the power face pointing upwards.
This is your basic paddling position. It's the position in which you hold your paddle whether you are paddling forwards or backwards, maneuvering or doing support strokes. You will usually hold it in this position to roll your kayak.
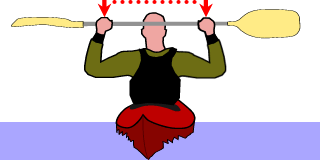 With a European-style paddle, your hands will almost always hold the paddle shaft at the same two points. You need to be able to find these points in a fraction of a second if one hand slips, or if you're upside down. To make this easier, a lot of kayakers wrap some waterproof tape round their paddle shaft to mark the points. They may also put a little padding under the tape so the shaft is oval at that point. This is called indexing.
So, exactly where should you put your tape? How far apart should your hands be? Try it, and see what works best for you. You want to be comfortable, and you also want to be able to do things like draw strokes without having to slide your hands along the paddle shaft.
One common guideline is "the width of your shoulders or hips, plus two hand widths". I never measured these things in my life until now, but I find that shoulder width plus three hand widths works for me. It works out like this: My shoulder width is 19 inches, my hand width is 4 inches. Measured centre to centre, I find that the tape on all my paddles is 30-31 inches apart. That distance works for me, maybe because I'm tall (6 feet 3 inches).
More and more sea kayakers are using traditional Inuit-style paddles with long narrow blades, a short shaft and no feathering. This takes a slightly different paddling technique. See Using A Greenland Paddle.
Basic instructions for forward paddling are just "put the blade in the water and pull it towards you, then repeat on the other side".
However most of us use a paddle with feathered or off-set blades. Throughout Kayarchy we assume that you have a feathered paddle with right-hand control. Your right hand is the "control hand" which grasps the paddle lightly but firmly at all times. Sit upright and hold your paddle in the basic paddling position, with the right blade vertical and its concave side facing back to the rear of the kayak. Reach forward with the right blade, put it in the water, pull it back.
Now reach forward with the left blade. It's at the wrong angle to enter the water so rotate the shaft by rolling your right wrist backwards. As if you are revving up a motorcycle. Don't roll your left wrist backwards too, just relax the grip of your left hand so the shaft can rotate freely. Put the left blade in the water, pull it backwards.

And that's just about all you need to do to paddle forwards.
Go gently to start with. If you try to go hard and fast at this stage, you may go for a swim. Don't worry too much about going in a straight line. And that's more or less it, but there are some possible improvements.
It's possible to use only your arm muscles when paddling forwards, but much better to do a lot of the work with the large powerful muscles in your back and upper body. Even your leg muscles can make a contribution. It's easy if you add "torso rotation" to your paddling technique.
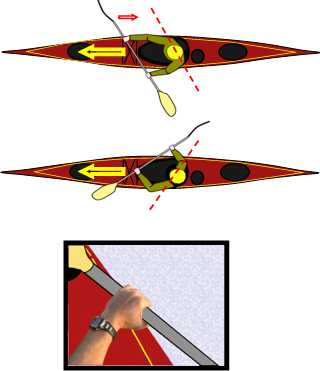 |
It doesn't mean leaning forwards and backwards as if you were hauling on a rope, but rotating your upper body from the waist. Every time you take a stroke, your shoulder follows the blade backwards. An imaginary line drawn across your shoulders stays almost parallel to the paddle. Towards the end of a forward paddle stroke on the right, your left hand crosses slightly over the centerline of the kayak. Mirror that every time you take a stroke on the left. Try it for five minutes. Probably you will notice a real difference. |
Try to keep the entire blade in the water, but none of the shaft.
Try always to sit upright to paddle. It is more tiring to paddle while leaning backwards, and you have less control.
Try taking longer, slower strokes. Novices seldom take strokes which are too long and slow but the opposite is very common.
The only time you need to grip the paddle hard is when you are accelerating hard or punching out through surf. If you are in a scary situation and you realize you are holding your paddle in a death-grip, relax. You're wasting energy. On a long trip, try opening your fingers of the top hand every time you push it forwards.This will help the circulation of blood in your hand and forearms.
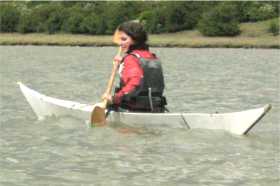
On flat water a 17 foot sea kayak goes in a straight line as if it's running on rails. If you're learning in a shorter kayak, with a waterline 10 feet long or less, it will keep on trying to to turn sideways and stop. A short kayak can be a real pain in windy conditions on open water. Overcoming this takes practice but you will have the feel for it by the time you've done two or three trips.
There's only one secret, which is not to put the brakes on if you don't have to. Let's say you're paddling along forwards in a straight line. Everything's fine, but then your boat starts turning to the left. You want to straighten up. You're tempted to try a reverse paddle stroke on the right. This will work, certainly, but it'll also slow you down. It's a waste of energy. Instead of "back paddling" on the right, do a forwards sweep stroke on the left. This will put you back on course without slowing you down. There's no need to break the rhythm of your paddling, just substitute a left forward sweep stroke for one of your left forward paddling strokes. (Sometimes a short kayak will wander so far off course in just one or two seconds that a forwards sweep stroke won't do it. In that case, go back to Plan A: Straighten up by doing a reverse paddle stroke on the opposite side.)
If one of your group is in a short kayak and has real difficulty going in a straight line, (s)he will soon get tired. Consider attaching a rope to the back of his/her kayak, as a tail. It works like magic. You can use a tail anything from 5 to 30 feet long. A tow-belt is perfect for this.
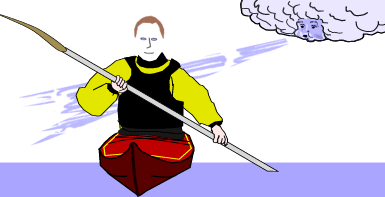
In a sidewind, most kayaks have a tendency to turn into the wind. This is called weather helm or weathercocking. Some sea kayaks are fitted with a skeg or rudder to reduce it. (A few kayaks have a tendency to turn downwind, and you won't be surprised to hear that it is called lee helm or leecocking).
You can resist weathercocking by paddling a bit harder on the upwind side, or doing the occasional sweep stroke on the upwind side. If this gets to be a real nuisance, you can try changing your grip so the paddle is extended more to one side than the other. Say you keep turning to the left. Just slide your hands along the shaft and grip the paddle with each hand 6 inches to the right of the usual position and keep on paddling as normal.
If you use a Greenland paddle it is very easy to use an extended grip like this, or you could use the sliding stroke on one side.
When you set off for an overnight trip you may have to re-pack your kayak after a short distance, to improve its handling. Many kayaks behave better in windy conditions if the rear end is slightly heavier than the front.
See Kayaks & Surf.
If you want detail, this is how we do forward paddling. It works for us, but we do comfort not speed.
Hold the paddle the regular way. Sit upright or leaning very slightly forwards. Raise your left hand to the level of your left shoulder or slightly above but about 12 inches in front. Reach forwards with your right arm as far as you can with comfort. Put the blade in the water. It will enter the water by your right foot or thereabouts, depending on the length of your paddle.
Pull your right hand backwards, keeping the right paddle blade in the water close to the kayak. As you do so, press forwards with your left hand and start rotating your upper body to the right. The clearest sign that you are doing so is that your left hand moves to the right so that by the end of the stroke it reaches or even crosses the centerline of the kayak.
As your right arm moves backwards, bend your elbow so that the blade stays just under the surface of the water. Carry on pulling your right hand back until it is next to your hip. Then lift the blade out of the water and raise your right hand until it is just in front of your right shoulder.
By this time your left arm is extended forwards, elbow slightly bent, so you are ready to take a stroke on the left. Raise your right hand until it is about level with your shoulder and 12 inches in front of it. If you have a European-style paddle with right-hand control, twist your right wrist back towards you so that when you put the left blade in the water, it will be at a good angle. To allow the paddle shaft to twist to this angle, relax your left hand slightly.
Paddling on the left is just the mirror of what you do on the right.
"We saw our [Inuit] friend Micardi kayaking out in the fjord, recognizing him from afar by his peculiar style".
F Spencer Chapman, Watkins' Last Expedition, 1934
Everybody has his or her own way of walking, with his or her preferred length of pace, body rotation, swing of arms. We would say that there's nothing wrong with having your own gait on foot or in a kayak.
However if you want to win races or get advanced coaching qualifications, you need precision. You'll need a copy of the BCU Coaching Handbook, Pesda Press, 2006. There's a chapter on forward paddling with input from top Hungarian coach Kemecsey Imre. We count forty-three photos of champion kayakers looking grim. Some are taken from behind, but you can still tell they're looking grim. And there's a smiley one of Graham Campbell, the L4 coach who wrote the chapter.
A candidate for advanced coaching qualifications would probably be expected to de-construct forward paddling into the "catch" when the blade first bites into the water, the pull-through phase and the exit phase; to explain power circles 1 to 5; to think in terms of moving the boat past the paddle not the paddle past the boat; to analyze each phase in terms of torso rotation, arm extension and timing; to think what is being done by the torso, arms, lower body (feet and knees) and the head; and to be aware of the way in which thrust is transmitted to the kayak.
Some of that thrust is transmitted by the feet, which press against the footrest in a cycling action as you paddle. In the words of the BCU Coaching Handbook "each foot compresses the footrest to gain support for the stroke on that side".
You may have come across the high angle vs. low angle debate. Flat-water racing coaches recommend a high-angle position, with the upper hand in front of the forehead and the paddle shaft almost vertical when paddling forwards.
We aren't convinced that racing technique is ideal for ordinary sea kayaking, but you may be required to demonstrate it in order to get a kayaking qualification.
 |
Few sea kayakers use a high paddling position except when sprinting, or punching out through surf. Most prefer to have their top hand at or slightly above shoulder height. Or, as in this illustration, even lower in windy conditions. Kayakers who prefer a long paddle tend to use a fairly low angle all the time. |
There's another debate about when, in forward paddling, you should lift your blade out of the water. Some top coaches and textbooks say you should take your blade out of the water before it gets back as far as your hip. A lot of sea kayakers keep the blade in the water until the lower hand gets back as far as their hip. So the blade is some distance behind their hip by the time it leaves the water.
Sit upright and hold your paddle in the basic paddling position. Hold it exactly as you would for forward paddling. When you paddle backwards it is not the power face of the blade that does the work, but the back of the blade.
 |
As with forward paddling, you should use your whole body and not just your arms. Also, you want to be able to see where you are going. So, each time you reach behind you to take a reverse stroke on the left, follow your paddle backwards with your left shoulder, and turn your head to look backwards over your left shoulder. Try to twist far enough to see the back of the boat. And the same when you take a stroke on the right. Your body will follow your head, so you will automatically have excellent torso rotation to power you along. |
Go to next page for:
• Sweep Strokes